Back to FDTD Example (main page)
Creating the Projects
Open MicroSoft Visual Studio 2005
Create a new FDTD solution/project
File -> New -> Project...
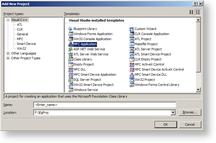
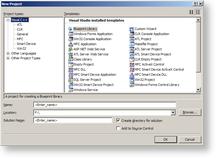
On the popup Create Dialog
Visual C++ tab select Template Blueprint Library
Name field enter FDTD
Location field enter <Drive>:\<Path>\ (specify the path to the directory you wish to host the project)
Solution field enter FDTD (this should be automatically filed in by the dialog)
Tick CreateDirectory for Solution
Select OK
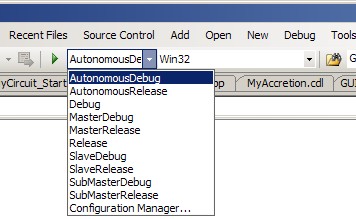
Select the FDTD project in the Solution Explorer window, then select AutonomousDebug from the Build Configurations Option.
Create GUI project
Select Solution
Right Click -> Popup Menu -> Add-> New Project...
On the popup Create Dialog
Visual C++ tab select Template MFC Application
Name field enter GUI
Location field enter <Drive>:\<Path>\ FDTD (specify the path to the FDTD directory)
Solution field enter GUI (this should be automatically filed in by the dialog)
Tick CreateDirectory for Solution
Select OK
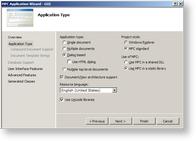
On MFC Application Wizard
Select Dialog Based and MFC Static Library
Untick Use Unicode Libraries
Select Finish
For this example all other options are defaulted.
Set up GUI Properties
These properties are for the debug build (release are similar)
Select the GUI project in the Solution Explorer Window. Then select Right Click -> Popup Menu -> Set as Startup Project.
Select Debug from the Build Configurations Option
Select the GUI project in the Solution Explorer Window. Then select Right Click -> Popup Menu -> Properties...
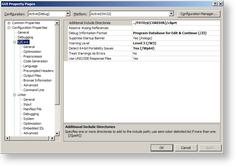
On the popup Properties Dialog
C++ tab
General tab
Additional Include Directories field enter ../FDTD;$(COREDIR)ClipRT
Preprocessor tab
Preprocessor Definitions field add ;CLP_PLATFORM_WIN32
Pre-compiled Headers tab
Create/Use Pre-compiled Header select Dont Use Pre-compiled Headers
Linker tab
General tab
Output File field modify name to include include _d.exe
Additional Library Directories field enter ../AutonomousDebug
Input tab
Additional Dependencies field enter nafxcwd.lib fdtd_ad.lib
Select OK
 Click to
enlarge